Coastal Living
The Coastal Family Dehumidifier, Humidistat, and Portable Air Purifier Decontamination Protocol: Mitigating Biofilm-Slime, Fine Salt-Dust Cement, and Botanical Sanitization in Grand Strand Homes
A technical, safe guide to cleaning and sanitizing coastal home air-treatment systems to eradicate humid mold growth, sticky salt-dust cement, and bacterial biofilms.
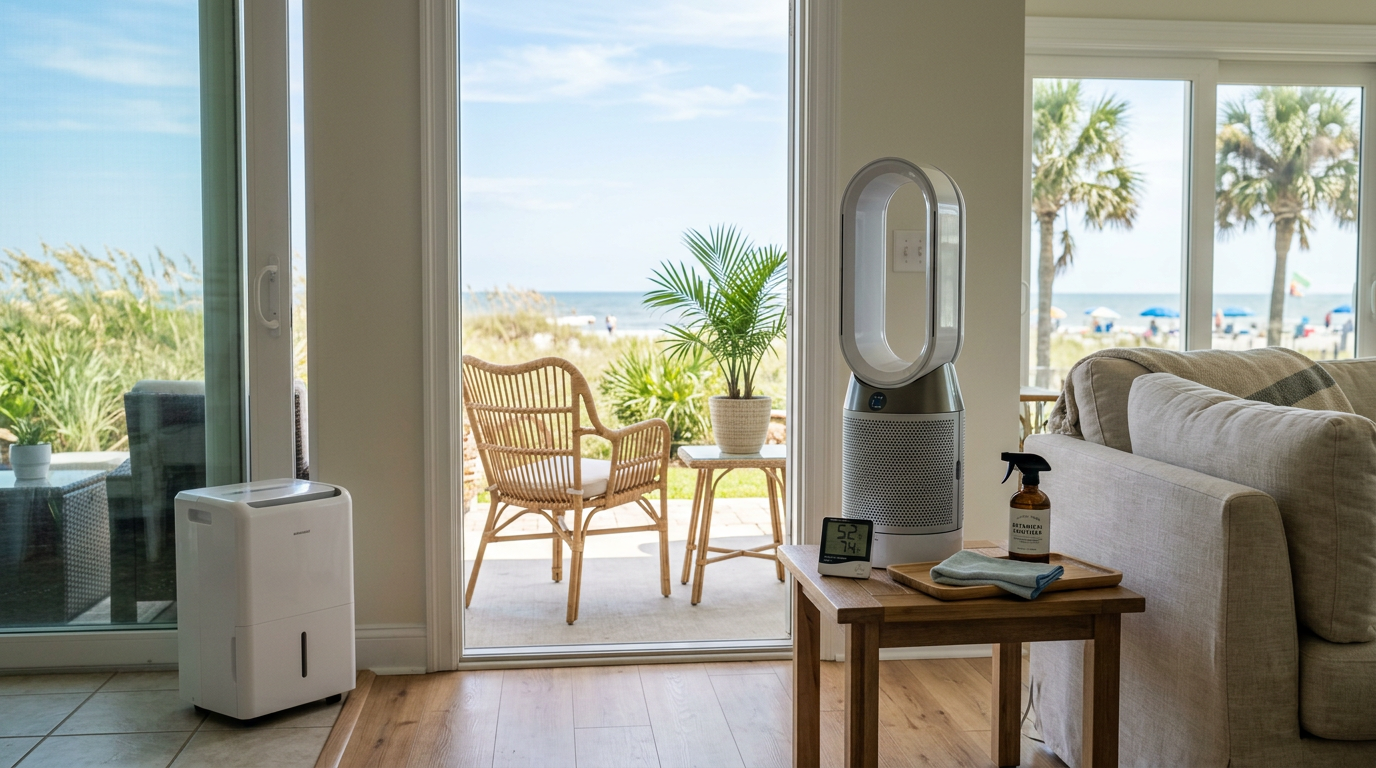
In the humid microclimate of Myrtle Beach and the surrounding Grand Strand, residential air-treatment systems are essential for maintaining comfortable, healthy indoor spaces. However, the continuous moisture extraction and high air-filtration loads put intense stress on portable dehumidifiers, humidistats, and HEPA air purifiers. Without a dedicated sanitization routine, these systems quickly turn from air cleaners into secondary sources of indoor pollution. This guide outlines a safe, botanical-based decontamination protocol designed to keep your family's air-treatment appliances running efficiently and breathing cleanly.
The Grand Strand Microclimate and Its Impact on Air-Treatment Systems
Living along the Grand Strand brings beautiful ocean views but also subjects homes to extreme outdoor relative humidity that frequently climbs above eighty percent. To combat this damp air, local families rely heavily on portable dehumidifiers and air purifiers to maintain dry, clean indoor spaces. When these units run continuously, they pull vast amounts of humid, salt-laden air through their internal systems, depositing airborne particulates on every interior surface.
The unique challenge in our coastal environment is the combination of salt spray and household dust. Microscopic sodium chloride particles act as natural moisture magnets, binding with skin cells, pet dander, and pollen to form a sticky, cement-like film on intake grilles and pre-filters. This sticky layer restricts airflow, forces motors to work harder, and provides a nutrient-rich foundation for biological growth inside the damp dark interior chambers of your appliances.
When warm, humid air meets the cold evaporator coils of a dehumidifier, rapid condensation occurs. If the water collection bucket and internal drain paths are not regularly sanitized, standing water at typical indoor temperatures becomes a breeding ground for bacteria and mold. Standard cleaning routines that rely on basic water rinses or aggressive, toxic chemicals fail to safely address this problem, highlighting the need for a specialized, non-toxic decontamination process.
- Continuous high humidity levels overload standard filtration media within weeks.
- Salt air acts as a binding agent, trapping organic allergens on intake grilles.
- Stagnant reservoir water creates prime conditions for rapid biofilm formation.
- Restricted airflow increases energy consumption and causes premature system wear.
Understanding the Chemistry of Salt-Dust Cement and Biofilm Slime
To effectively clean these appliances, we must look at the science of what builds up inside them. Sodium chloride from ocean breezes undergoes deliquescence, meaning it absorbs moisture from the air until it dissolves into a liquid solution. When this salty moisture lands on plastic fan blades and filter housings, it traps passing dust. As the machine dries during off-cycles, the salt recrystallizes, cementing the dirt and organic matter into a hard layer that cannot be removed by simple dusting.
Inside the water reservoir, an entirely different threat develops in the form of bacterial biofilm. Biofilms are microscopic communities of bacteria and fungal spores that anchor themselves to plastic surfaces by secreting a slimy, protective matrix of extracellular polymeric substances. This self-produced slime shields the underlying pathogens from standard wiping, allowing mold and bacteria to thrive even if the water is emptied regularly.
When these systems are neglected, the air blowing out of your dehumidifier or air purifier carries microscopic mold fragments and viable spores directly into your living room or bedrooms. Instead of purifying your home, the machine aerosolizes these contaminants, which can trigger respiratory issues, allergies, and persistent musty smells. Breaking down both the salt-dust cement and the biofilm requires specialized, child-safe botanical chemistry and physical agitation.
- Salt crystallization acts as a structural glue for household dust and allergens.
- Biofilms form a protective shield that resists simple rinsing and light wiping.
- Aerosolized mold spores from dirty units degrade overall indoor air quality.
- Microscopic fungal fragments can settle deep into carpets, upholstery, and drapes.
The Decontamination Workstation Setup and Botanical Material Selection
Before beginning the cleaning process, it is critical to set up a safe, designated workstation to prevent spreading spores and dust throughout your living spaces. We recommend working outside on a breezy patio, on a screened porch, or in a well-ventilated garage. Lay down clean, thick cotton towels or a heavy-duty silicone utility mat to catch water drips and protect the appliance's plastic outer casings from scratches during disassembly.
Protecting your own health during cleaning is just as important as restoring the machine. Wear nitrile gloves and a well-fitting N95 mask to avoid breathing in disturbed mold spores or inhaling fine dust particles while brushing out the components. For cleaning solutions, bypass harsh chlorine bleach, which can corrode internal metal parts and off-gas harmful chemicals, and instead choose an EPA-registered botanical disinfectant formulated with thymol or citric acid.
Gather a specialized selection of physical cleaning tools to reach into every crevice of the machine. You will need soft-bristled detailing brushes of various sizes, several clean microfiber cloths, a flexible bottle brush for narrow drainage channels, and a basin of warm, soapy water mixed with a plant-derived surfactant. Avoid using stiff wire brushes or abrasive plastic scouring pads, which can scratch the plastic and create micro-grooves where mold can easily anchor in the future.
- Work in a well-ventilated outdoor or garage area to protect indoor air.
- Wear nitrile gloves and an N95 mask to limit exposure to mold spores.
- Select botanical sanitizers like thymol or citric acid over harsh chlorine bleach.
- Use soft-bristled brushes to protect delicate plastic and metal components.
Step-by-Step Deconstruction and Pre-Filter Cleaning Protocol
Begin by unplugging the dehumidifier or air purifier from the wall outlet to eliminate any electrical safety risks. Carefully remove the external grilles, intake panels, and water-collection buckets according to the manufacturer's directions, placing all detachable plastic parts into your washing basin. Take a moment to inspect the internal layout, noting the placement of filters and sensors so you can reassemble them correctly later.
The pre-filter is your machine's first line of defense, designed to catch large hair, lint, and dust particles, but in coastal homes, it quickly becomes choked with salt-dust cement. Submerge the mesh pre-filter in warm water mixed with a mild plant-based degreaser, allowing it to soak for fifteen minutes to dissolve the sticky salt bonds. Once the build-up softens, gently sweep the mesh with a soft nylon brush to clear the remaining debris.
Rinse the clean pre-filter thoroughly under warm, running tap water until the water runs completely clear. Shake off the excess water and lay the filter flat on a dry towel in a warm, shaded spot to dry completely. Never reinstall a damp filter, as placing wet media back into the active airflow of the machine will immediately trigger localized mold growth and damage internal humidity sensors.
- Always disconnect the electrical power supply before starting disassembly.
- Soak pre-filters in warm, soapy water to dissolve the salt-dust binder.
- Clean gently with a soft brush to prevent tearing delicate mesh screens.
- Allow components to dry completely on clean towels before reinstallation.
Remediation of Dehumidifier Water Reservoirs and Drainage Ports
The water collection bucket requires a methodical sanitizing process to eradicate the biofilm slime that clings to its interior walls. Empty any standing water, then spray all interior surfaces generously with your botanical thymol-based disinfectant, paying close attention to the tight corners, handles, and the float-switch assembly. Let the solution sit for ten minutes to allow the natural active ingredients to completely break down the EPS matrix.
While the disinfectant dwells, clean the gravity-drain ports and auto-drain line fittings, which are common hubs for pink yeast and algae blocks. Insert a flexible, long-reach tube brush into the drain outlet, twisting it gently to scrub away any slime build-up. If your dehumidifier uses a clear vinyl drain hose that has turned dark brown or green with algal growth, replace the tubing entirely rather than trying to clean it.
After the dwell time has passed, scrub the interior of the reservoir thoroughly with a non-abrasive microfiber sponge to lift the loosened biofilm. Rinse the bucket with fresh, filtered water, dry the outside with a clean towel, and test the float-switch mechanism to ensure it moves smoothly up and down. A clean, free-moving float switch is essential for preventing water overflows when the unit goes back into operation.
- Apply botanical disinfectant and allow a full ten-minute dwell time.
- Scrub corners and float-switch parts with a non-abrasive sponge.
- Clear drainage ports using a flexible, long-reach tube brush.
- Replace deeply stained vinyl drain hoses to prevent recurring blockages.
Evaporator Coil, Condenser Fin, and Fan Blade Detailing
Over months of use, fine dust particles bypass pre-filters and settle on the damp evaporator coils of your dehumidifier, forming a wet, dusty blanket that reduces cooling efficiency and breeds mold. Carefully access the coil area behind the filter housing and use a soft-bristled brush to sweep away loose dirt. Always brush in the direction of the aluminum fins to avoid bending or flattening the delicate metal pieces.
Apply a rinse-free, self-draining botanical coil cleaner designed specifically for residential appliances. This specialized spray foams up to penetrate deep between the tightly spaced aluminum fins, dissolving stubborn salt-dust residues and washing them down into the drain pan as the unit runs and condensation forms. This step restores optimal heat transfer, helps lower energy bills, and eliminates deep-seated musty smells.
Next, inspect the fan blades or blower wheel, which often collect unbalanced layers of dust that cause loud vibrations and wear out the motor. Wipe each blade individually with a microfiber cloth dampened with botanical sanitizer, taking care not to let any moisture drip into the electric motor casing. Once clean, spin the fan manually to make sure it rotates smoothly and quietly without any resistance.
- Brush metal evaporator fins gently to prevent bending the thin aluminum.
- Use self-draining botanical coil cleaner to dissolve hidden internal dust.
- Clean blower wheels to prevent motor strain and quiet noisy operations.
- Protect electrical motor housings from direct contact with liquid cleaners.
Air Purifier HEPA and Carbon Filter Lifecycle Management
Unlike pre-filters, true HEPA filters and activated carbon filters cannot be washed or exposed to liquids. Wetting a HEPA filter ruins the delicate, tightly woven glass fiber structure that captures microscopic allergens down to 0.3 microns, rendering it useless. Inspect these filters under a bright light: if the filter media looks dark gray, displays dark spots, or gives off a stale odor, it has reached its capacity and must be replaced.
Activated carbon filters are essential in coastal homes for capturing marsh odors, pet smells, and volatile organic compounds, but they have a limited lifespan. Carbon filters work through chemical adsorption, and once all their microscopic pores are filled, they can begin releasing trapped odors back into your rooms. In the humid Grand Strand environment, carbon pre-filters should be replaced every three to six months to keep air smelling fresh.
Before sliding your new or inspected filters back into place, vacuum the inside of the empty filter chamber with a HEPA-filtered vacuum cleaner. This removes any loose dust, pet hair, or mold spores that may have settled in the housing corners. Wipe the empty chamber down with a damp microfiber cloth, let it dry completely, and then insert your dry, clean filters in the correct airflow direction.
- Never wash true HEPA or carbon filters, as moisture destroys their structure.
- Replace discolored, dark gray, or musty HEPA filters immediately.
- Change carbon filters every three to six months to prevent odor re-emission.
- Vacuum the inner filter chamber before installing replacement filters.
System Reassembly, Humidistat Calibration, and Calibration Testing
Once all components are dry and sanitized, carefully reassemble the appliance in the reverse order of disassembly. Reinstall the HEPA and carbon filters, paying close attention to the airflow direction arrows printed on their frames to ensure proper filtration. Reattach the pre-filter, snap the intake grilles back into place, and secure the water bucket, listening for the positive click of plastic latches to avoid vibration noises.
The humidistat sensor inside your dehumidifier can become coated in fine salt residue over time, leading to inaccurate humidity readings and causing the unit to run too often or not enough. Locate the sensor opening, usually a small slotted vent near the control panel, and gently clear it of dust using a dry cotton swab. This simple step ensures the sensor reads your room's air accurately.
Plug the unit in and run it on its highest fan setting for fifteen minutes in an open room to verify performance. Place a separate, trusted digital hygrometer nearby to check that your dehumidifier's humidity reading matches the room's actual level within a five percent margin. Listen for quiet, balanced operation and verify that the air blowing out is fresh, dry, and free of any musty or chemical odors.
- Verify correct airflow direction when installing HEPA and carbon filters.
- Ensure all plastic latges snap firmly into place to prevent rattling.
- Clean the humidistat sensor with a dry cotton swab for accurate readings.
- Test run the unit for fifteen minutes to verify quiet, fresh-smelling airflow.
Key takeaway
Maintaining clean air-treatment systems is essential for managing the humid, salt-rich air of the Grand Strand. By following this botanical decontamination protocol, you can protect your family's health, improve your indoor air quality, and extend the lifespan of your appliances. For expert home care and thorough cleaning services across Myrtle Beach, contact the family-owned team at A2Z Cleaning & Linen Services at 843.800.2788.
Keep Reading
Coastal Living
The Coastal Wicker, Rattan, and Woven Reed Furniture Decontamination Protocol: Mitigating Humid Mold Colonization, Allergen-Binding Crevices, and Fiber-Safe Botanical Restoration in Grand Strand Homes
ReadCoastal Living
The Coastal Louvered Door and Airflow Closet Decontamination Protocol: Mitigating Damp Dust Slats, Mold Spores, and Eco-Friendly Airway Protection in Grand Strand Homes
ReadCoastal Living
The Coastal High-Velocity Ceiling Fan and Vaulted Ceiling Decontamination Protocol: Mitigating Static-Cling Allergen Crust, Humidity-Driven Mold Spores, and Eco-Friendly Dust Capture in Grand Strand Homes
ReadReady for a spotless property?
Call 843.800.2788 or request a free quote from A2Z Cleaning & Linen Services.